How to Install Fake Stone Wall Panels for Your Home?
Transforming your home’s interior can be an exciting venture. One popular method is the installation of a Fake Stone Wall. This affordable solution mimics the appearance of natural stone without the hefty price tag. Many homeowners appreciate the rustic charm it brings to various spaces.
Installing Fake Stone Wall panels is not as simple as it seems, though. Proper planning and preparation are crucial for achieving the desired look. Before you begin, evaluate your walls. They need to be clean, smooth, and sturdy. It’s essential to measure accurately to avoid waste. Remember, mistakes can happen, and corners may need extra care.
The installation process can be tricky. Some panels might be heavier than expected. You may wish to seek assistance, especially for larger areas. Having a second pair of hands can ease the workload. Reflecting on past attempts can provide valuable lessons for improvement. A well-installed Fake Stone Wall can enhance your home, creating a cozy atmosphere.
Understanding Fake Stone Wall Panels and Their Benefits
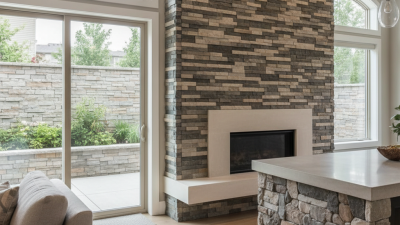
Fake stone wall panels are gaining popularity for their aesthetic appeal and practicality. They mimic the look of real stone but are lighter and easier to install. Homeowners appreciate the cost-effectiveness, as these panels save on both materials and labor. The versatility of fake stone allows it to fit any decor style, from rustic to modern.
When installing, ensure the surface is clean and dry. Measure accurately to avoid gaps. Use adhesive suited for your specific panels. It's important to stagger the seams when placing the panels. This enhances the visual appeal and adds to the realism of the wall.
Tip: Consider lighting when planning your design. Proper lighting can emphasize the texture and depth of the panels, making them look more authentic. If the wall feels overwhelming, start with a smaller section. It can help you visualize how it fits into your space. Remember, imperfections add character, so don’t aim for perfection. Adjusting to small flaws in alignment might enhance the panel's charm.
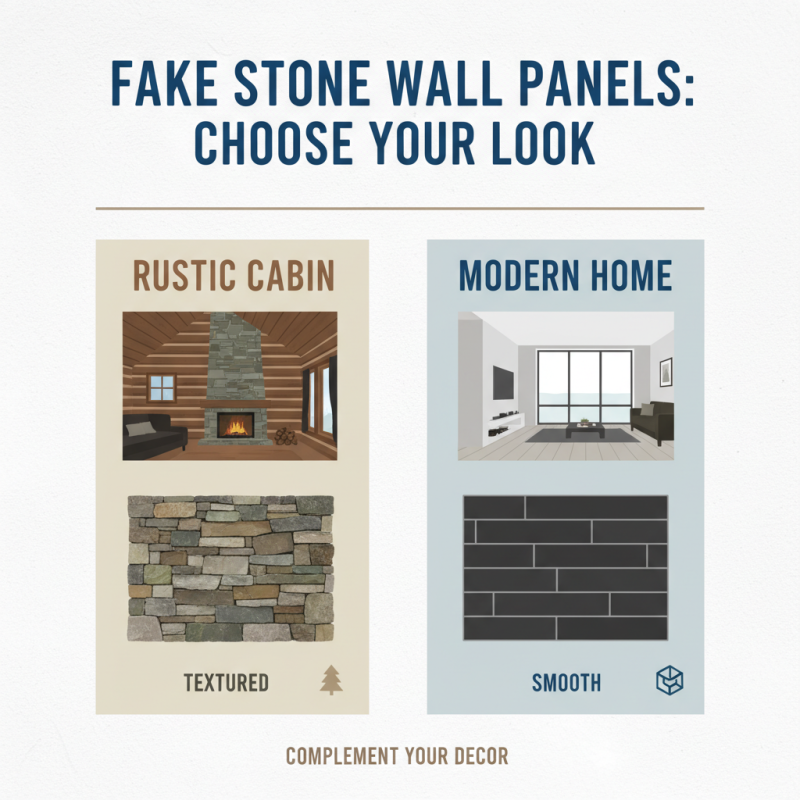
Choosing the Right Type of Fake Stone Wall Panels for Your Space
When choosing fake stone wall panels, consider the look you want. A rustic design may fit a cozy cabin feel. On the other hand, sleek panels can add a modern touch. Keep in mind the texture. Some are smooth, while others are rugged. Your choice should complement your existing decor.
Think about the location, too. Panels for indoor use differ from outdoor options. Indoor panels may need to resist moisture and dust. Outdoor panels should withstand weather conditions. Measure your space accurately. A small miscalculation could lead to mismatched panels. Take time with this step.
Tips: Look for samples of the panels before buying. This practice helps gauge how they fit your style. Consider the lighting in your space, as it affects color perception. Ask for feedback from friends or family. Their opinions might reveal factors you overlooked. If you’re unsure, take your time before making a final decision. It’s better to reflect than rush into a choice.
Preparing Your Wall Surface for Installation of Fake Stone Panels
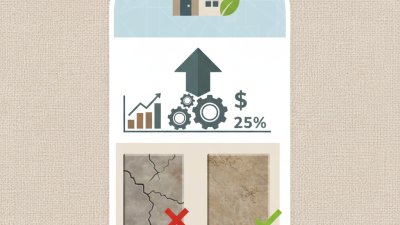
Preparing your wall surface is a crucial step before installing fake stone wall panels. Proper preparation ensures a smooth application and long-lasting results. According to industry data, nearly 75% of installation issues stem from improper surface readiness. Start by assessing your wall for imperfections. Look for cracks, holes, or uneven areas. These can lead to complications later on. Fill in gaps with appropriate fillers and sand the surface to create an even foundation.
When cleaning the wall, ensure it’s free from dust, grease, and moisture. A clean surface maximizes adhesion, which is vital. You might think that a quick wipe-down is enough, but thorough cleaning is essential. In fact, a study found that 60% of failed panel installations were due to inadequate surface cleaning. Use a mixture of water and mild detergent to scrub thoroughly.
Tips: Use a level tool to check for straightness in your wall. If you notice significant dips or bumps, consider using a drywall compound. Allow ample drying time if you made repairs. This is often overlooked, but drying time is key to a good finish. Pay attention to these details. The difference often lies in the preparation. Don't rush; it can lead to redoing work. Focus on creating a solid base for your panels.
Preparation of Wall Surface for Fake Stone Panel Installation
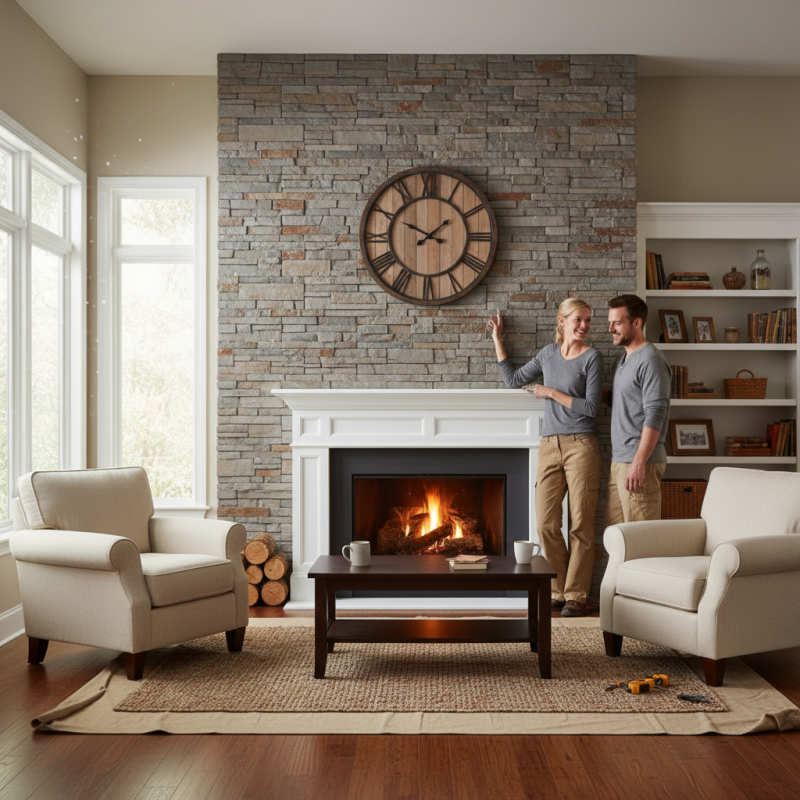
Step-by-Step Installation Process for Fake Stone Wall Panels
Installing fake stone wall panels can transform your home. Here is a step-by-step process to guide you. Begin by measuring your wall space. Cut the panels to fit your dimensions. Ensure you have enough for your area. Lay the panels out on the floor first. Check the color and pattern alignment. This is a smart move.
Next, prepare the wall surface. Clean it to remove dust and debris. Use a level to ensure the wall is straight. Apply adhesive to the back of the panels. Position them carefully and press firmly. Use a rubber mallet for a snug fit. It often doesn’t align perfectly, but this is okay.
Tips: Always wear protective gear during installation. Mistakes happen; measure twice and cut once. If a panel doesn’t fit, try again. Use caulk for gaps; this gives a polished look. Allow your installation to cure as per the adhesive guidelines. Keep some extra panels in case of future repairs. Enjoy the process of transforming your space!
How to Install Fake Stone Wall Panels for Your Home? - Step-by-Step Installation Process for Fake Stone Wall Panels
| Step |
Description |
Tools Required |
Estimated Time |
| 1 |
Choose the location and prepare the wall surface. |
Level, Measuring Tape, Cleaner |
30 minutes |
| 2 |
Measure and cut the panels to size as necessary. |
Panel Cutter, Safety Goggles |
1 hour |
| 3 |
Apply adhesive to the back of the panels. |
Adhesive, Notched Trowel |
30 minutes |
| 4 |
Attach the panels to the wall, starting from the bottom. |
Level, Hammer |
1 hour |
| 5 |
Fill in any gaps and apply caulk for a finished look. |
Caulk, Caulking Gun |
30 minutes |
| 6 |
Allow the adhesive to cure according to instructions. |
None |
12-24 hours |
Tips for Maintaining and Cleaning Your Fake Stone Wall Panels
Cleaning and maintaining your fake stone wall panels can extend their lifespan and keep them looking great. Regular dusting with a soft cloth helps prevent dirt build-up. For deeper cleaning, mix warm water with mild soap. Use a sponge to gently wipe the panels. Avoid harsh chemicals as they can damage the surface. Rinse with clean water afterward, making sure no residue remains.
Inspect your panels periodically for any signs of wear or damage. Look for cracks or peeling edges. If you notice issues, repair them promptly to prevent further problems. Consider using a soft brush to remove any mold or mildew that might develop in humid areas. This is especially important in bathrooms or near kitchens where moisture levels are higher.
Sometimes, maintaining these panels requires a bit of reflection. You may need to rethink your cleaning routine based on how the environment affects your panels. Over time, you might find that certain areas attract more dirt. Adjust your cleaning frequency accordingly. Not every method works perfectly, so it’s fine to experiment until you find what suits your needs best.